🚀 Mastering GitHub Flow: A Simple Guide
A process for better branching and git history.

This is Vukani Gcabashe, a software engineer / software developer living in South Africa. I am committed to Inspiration Starts Here but also practice programming by making websites or web applications on contract. I love what I do & trying to be quite good at it but getting there is a process, but we can do it together.
The GitHub Flow is a lightweight, branch-based workflow that ensures your main branch is always deployable. It's the standard for many high-velocity development teams, and it keeps things simple: everything starts with a branch.
Core Concept: Three Branches Only
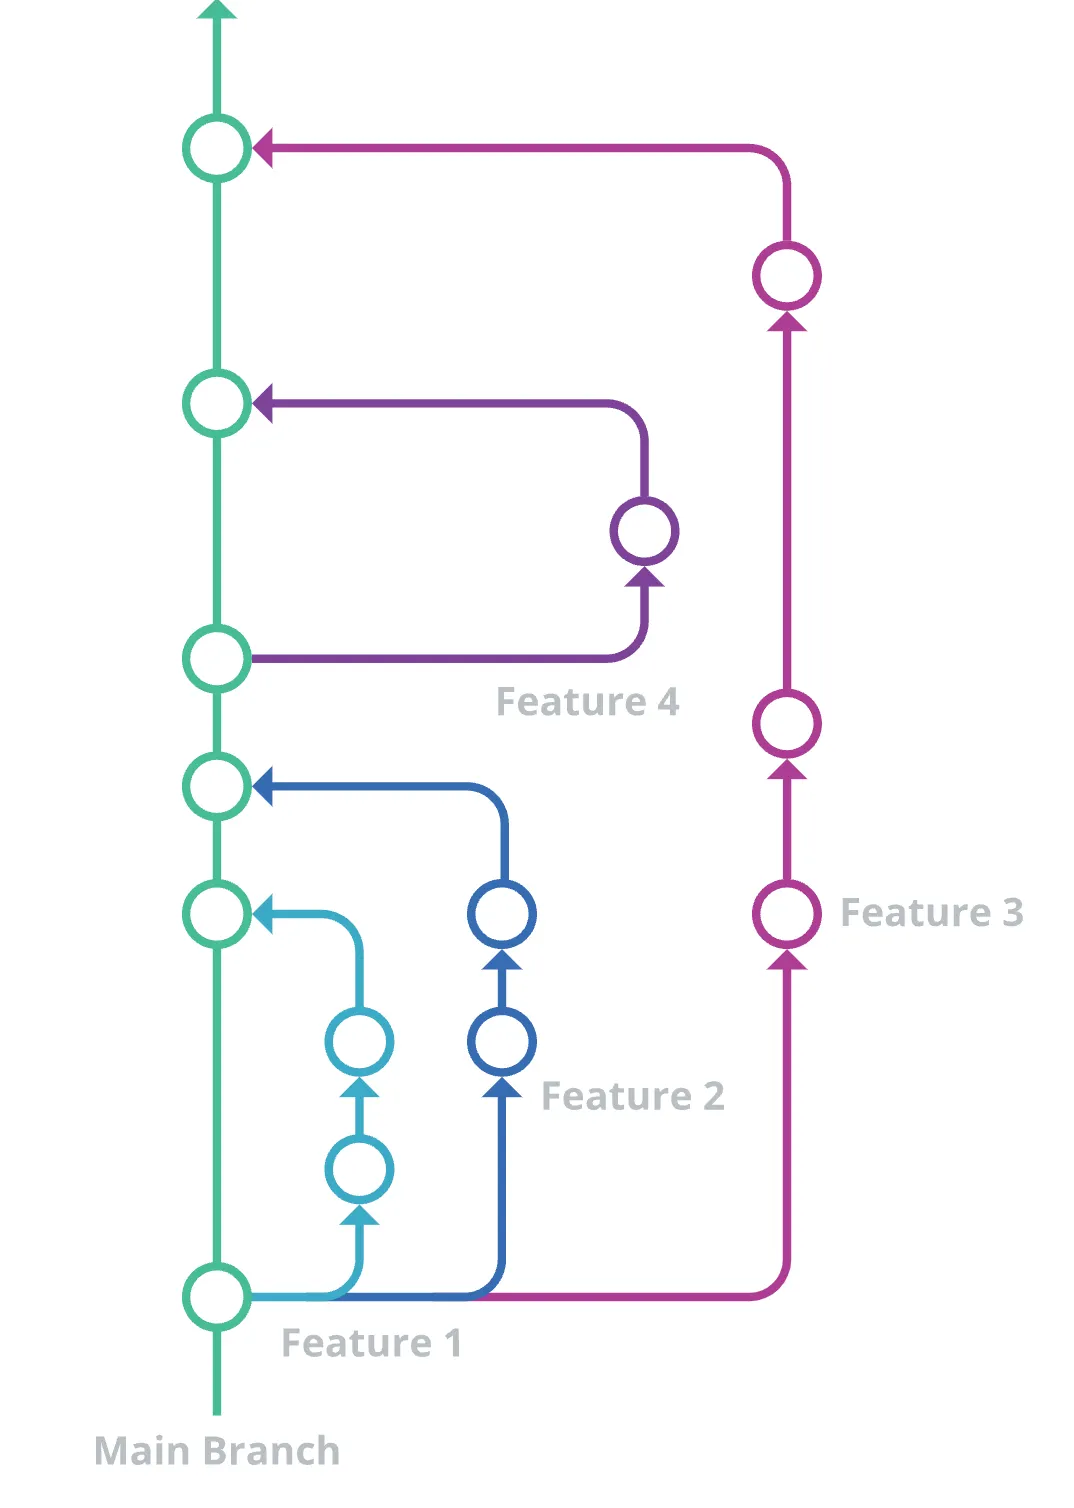
The beauty of GitHub Flow lies in its simplicity. You have one stable branch and multiple temporary feature branches.
Production-Ready Main Branch
The main branch contains your production-ready code. It is sacred! Every time you merge into
main, you should be ready to deploy that code immediately.
Feature Branches
All other branches, called feature branches, contain work on new features, bug fixes, or experiments. These branches are merged back into main only when the work is fully finished, tested, and properly reviewed.
Bug Branch:
This branch being created is the fix or bug-fix/… and this is where we add changes that will fix the issue or bug that has entered the main branch or feature branch. Some time just creating this branch and is a good way for other developers to know that the problem is being fixed.
✨ The 4-Step GitHub Flow Process
For every single task—whether it's adding a new button or fixing a major bug—you follow this simple lifecycle:
Create a Branch: Start a new feature branch off of
main.Commit & Push: Make your changes locally and push them frequently to your feature branch.
Open a Pull Request (PR): When your work is done (or ready for feedback), open a PR to discuss and review the changes.
Merge & Deploy: Once the PR is approved and passes all checks, merge it into
mainand immediately deploy the changes.
🛠️ Process: How to Create a New Branch
This is the command you will run every time you start a new task.
| Step | Action | Command |
| 1. Switch | Ensure you are on the main branch. | git checkout main |
| 2. Pull | Get the very latest updates from the remote main. | git pull origin main |
| 3. Branch | Create your new feature branch based on main and switch to it. | git checkout -b <branch-name> |
| 4. Push | Push the new branch to the remote repository. | git push -u origin <branch-name> |
🏷️ Branch Naming Convention
A consistent naming convention makes it easy to understand what work is being done without even opening the branch. Always use hyphenated lowercase (kebab-case) and include a prefix.
| Category Prefix | Example Task | Example Branch Name |
feature/ | Adding user registration | feature/add-user-registration |
fix/ | Fixing a display bug | fix/broken-footer-link |
chore/ | Setup or maintenance (non-code) | chore/update-dependencies |
refactor/ | Improving code structure | refactor/simplify-auth-hook |
docs/ | Updating documentation | docs/add-readme-notes |
Best Practice: Always reference the ticket or issue number if your project uses one (e.g., feature/TICKET-123-user-profile-editor).